A Common Pitfall of Spring Boot's RestTemplate

One of the most fundamental advantages of Spring Boot is the paradigm of convention over configuration, using default settings to reduce overhead work for developers. Even so, there is a tiny pitfall in the default behavior of Spring Boot’s RestTemplateBuilder that could lead to reliability issues.
In this post, we explore how to observe this reliability weakness with chaos experiments and the steps to take to update and validate your timeout configurations.
Using RestTemplateBuilder Default Settings
So what is the problem with the RestTemplateBuilder? To expose this, let’s review the behavior of two simple applications that communicate with each other over HTTP.
In this blog post, we use a simple demo online shop that consists of a Gateway microservice requesting an endpoint of another microservice (called Hotdeals) over HTTP. The following listing shows the relevant parts of the code; you can check the full source code of the demo online shop in the GitHub repository.
@RestController
@RequestMapping("/products")
public class ProductsController {
    private final RestTemplate restTemplate;
    @Value("${rest.endpoint.hotdeals}")
    private String urlHotDeals;
    ...
    public ProductsController(RestTemplate restTemplate) {
        this.restTemplate = restTemplate;
    }

    @GetMapping
    private List<Product> getHotDealsProduct() {
        return this.restTemplate.exchange(
            this.urlHotDeals,
            HttpMethod.GET,
            null,
            this.productListTypeReference
        ).getBody();
    }
}
While this code works fine under good conditions, the problem comes to light under turbulent conditions – for example, network problems such as network package loss. So how can we verify what will happen without changing the code or doing too much low-level network stuff?
With a testing platform like Steadybit, you can detect application targets automatically and run experiments to observe how your systems behave.
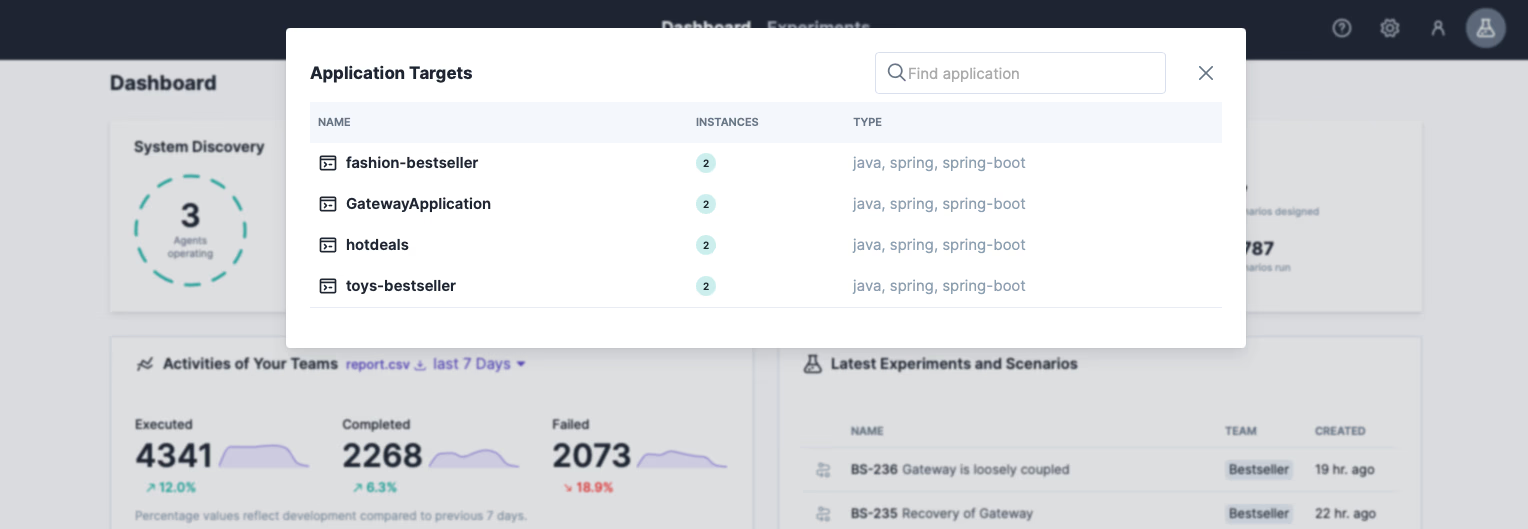
Testing to Uncover Reliability Gaps
Since Steadybit agents automatically discover your application, you can easily create experiments to test the behavior of different application targets. We will simulate dropping network packages for incoming and outgoing connections for Hot-Deals. Just follow the next steps to create and run the experiment. If you have not yet installed and configured Steadybit, request your demo to get started.
Step 1: Create an Infrastructure Experiment
First, you need to create and define a new experiment. When using Steadybit, this is quite simple:
- We go to Experiments and select a new infrastructure experiment (because we deal with the network).
- We give the experiment a meaningful name (e.g., “Gateway’s HTTP communication is robust”) and choose the “Global” area (providing you full access to all discovered targets).
- We decide to attack containers and specify them with attributes. The following screenshot shows the query we used to narrow down the targets to the microservice Hot-Deals.

- Since we want to achieve a maximum effect, we choose an impact of 100% in the following step of the wizard.
- Apply the “blackhole” attack from the “network” category to disrupt incoming and outgoing network connections. We can keep the default settings of the attack.
- We skip the “Execution and Monitoring” part and create the experiment by clicking Save experiment.
Step 2: Run the Experiment to Review Network Events
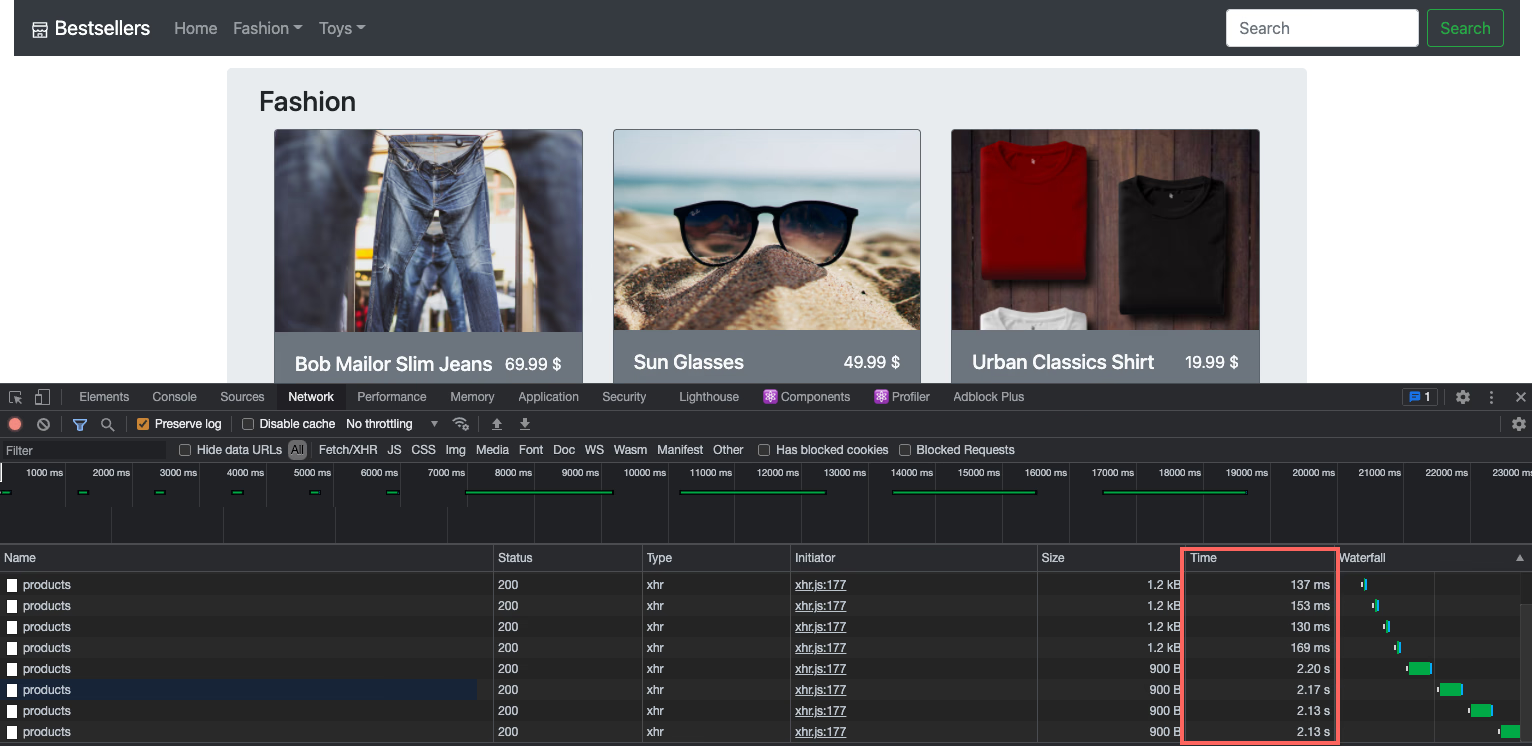
Now it’s time to run our experiment see what happens in the application by checking the Network tab.

Once the blackhole attack runs, the product list update is halted and remains pending (last line). The request is neither resolved nor automatically canceled for the entire experiment duration (30 seconds). Why is this? At least there should be some timeouts, right?
Step 3: Fix the Pitfall by Configuring RestTemplate Timeouts
As mentioned earlier, Spring Boot has many useful defaults that do not require additional configuration, but unfortunately, they are missing some for timeout configurations of RestTemplate or RestTemplateBuilder.
We correct the initialization of the container’s RestTemplate using the following code to fix this.
@Bean
public RestTemplate restTemplate() {
    return new RestTemplateBuilder()
        .setConnectTimeout(Duration.ofSeconds(2))
        .setReadTimeout(Duration.ofSeconds(2))
        .build();
}
Step 4: Rerun your Experiment to Verify the Fix
Now, let’s verify the new implementation by re-running the experiment to show that the application now waits for the endpoint‘s response for about 2 seconds and then terminates with an exception. This exception is caught and properly handled, as we verified in an earlier blog post.
Conclusion
In this blog post, we tested and improved handling a synchronous HTTP request under turbulent conditions. Using Steadybit, we proved that we cannot always rely on the default Spring Boot configurations and may need to adjust them to strengthen your reliability.
We used Steadybit to verify this issue without changing the source code or low-level networking. It also shows the importance of thinking about turbulent conditions when testing your code – even when using widely established frameworks and reasonable conventions.
If you want to get started with Steadybit to run your own experiments, you can sign up for a free trial or request a demo.

Get started today
Full access to the Steadybit Chaos Engineering platform.
Available as SaaS and On-Premises!
or sign up with

Book a Demo
Let us guide you through a personalized demo to kick-start your Chaos Engineering efforts and build more reliable systems for your business!