Blog
-
4 min
read
In this post we will discuss why it is important to have application start fast and how you can validate this continuously.
First of all, why are startup times essential? In the current days of cloud computing, fast-paced IT, and distributed systems, a short mean time to recovery (MTTR) is more important than mean time before failure (MTBF). If you want to know more about this, Dennis discusses this in detail in his blog post. Startup times are an important part of having a short MTTR. Having fast startup times doesn’t only mean that your systems recover fast. The further advantage is, it enables you to deploy many times a day, to patch or replace systems any time without the need for fixed maintenance windows or prior notice.
Make sure that your application is starting up in a specific timeframe. By the time you experience an unexpectedly long startup on the next production release, or the next unexpected disaster occurs, it's often too late. From an operations perspective, it is always good to know if the application will startup in a given time and to know that you won’t be badly surprised at any time. This means that you should test the startup time either on every deployment or at least frequently as you won’t foresee whether the following operating system update, configuration change, library update, or new feature will cause extraordinary startup times. So for us, the next steps are to design a suitable experiment to verify the startup time and then automate it.
Step 1: Express your Expectations with an Experiment
Before automating, we need to formulate our expectations and set up an experiment to test the expected behavior. In this blog post, we use our shopping demo deployed in a Kubernetes cluster.
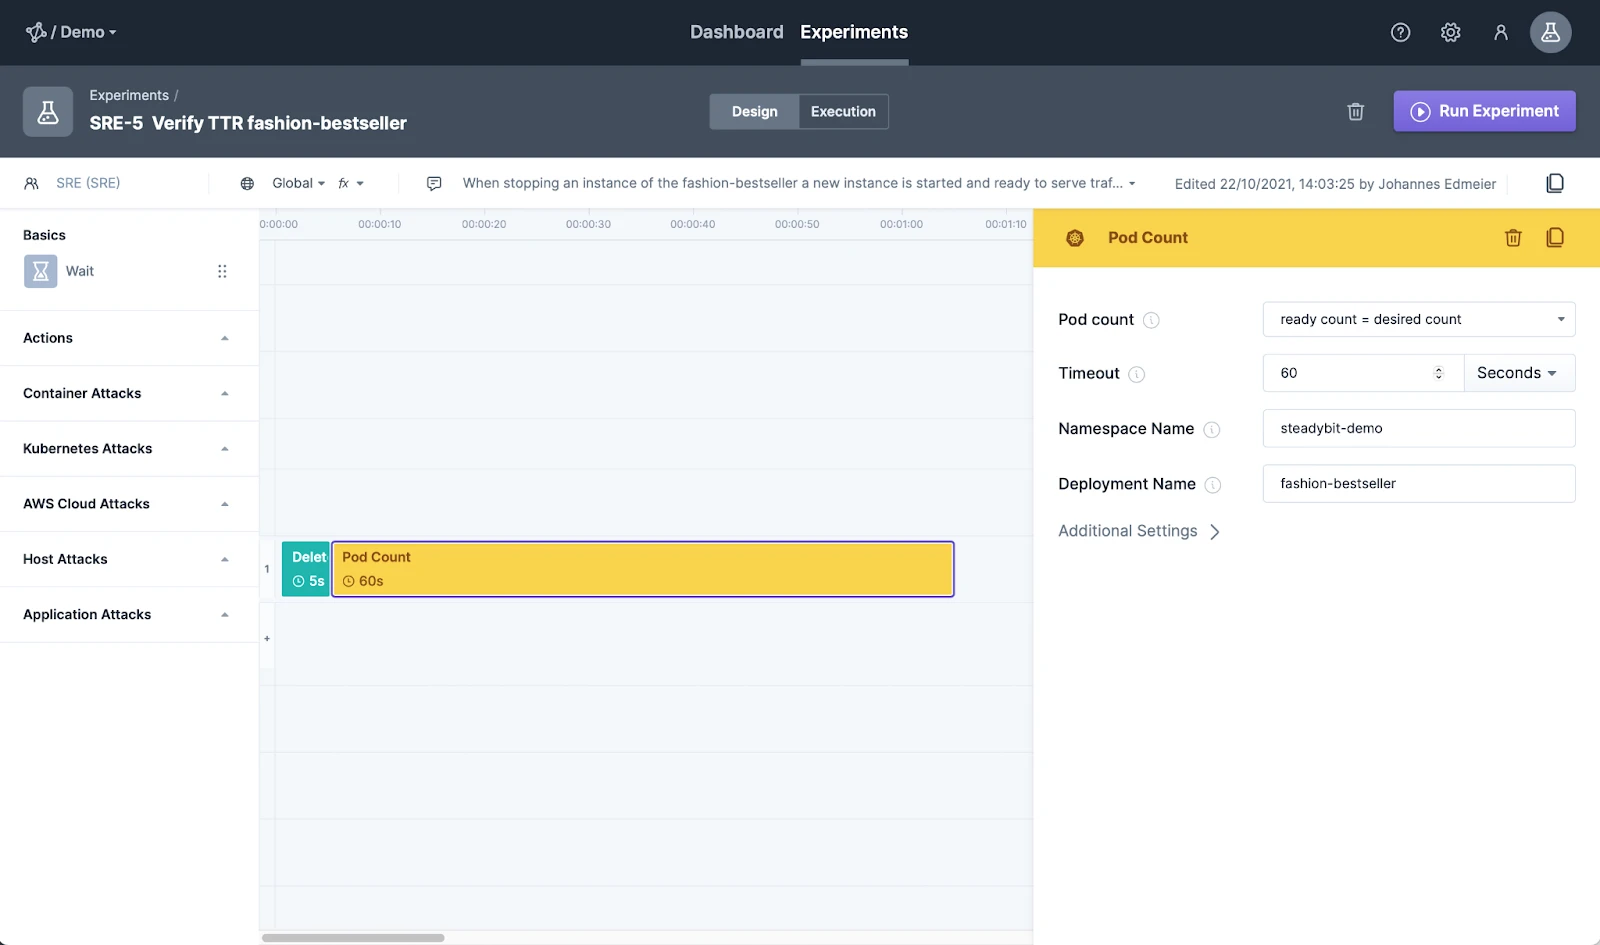
Hypothesis: When an instance of the fashion bestseller is removed, a new instance is launched and is ready to serve traffic again within 60 seconds.
An experiment for this hypothesis looks like the one in the screenshot.

First, we delete a single fashion-bestseller pod and then have a state check that waits at most for 60 seconds for all fashion-bestseller pods to become ready. In this way, we use the Kubernetes deployment's readiness check to determine whether or not it can handle the traffic. If you are not sure how to create an experiment take a look at our getting started guides.
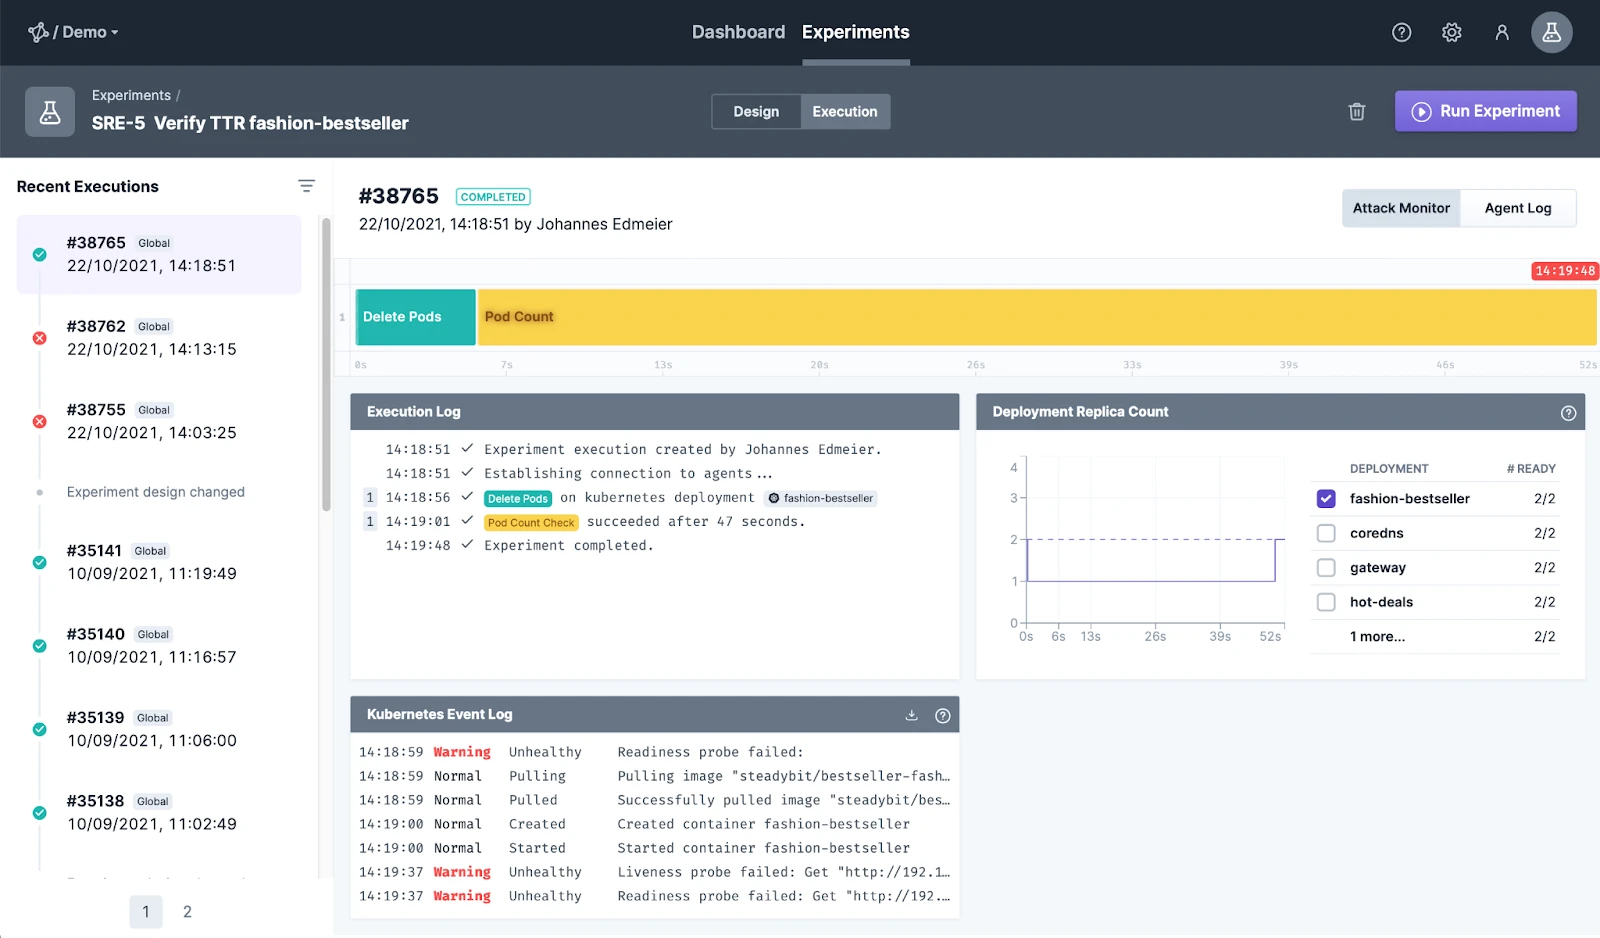
Before we put this experiment into our automation, we should run it manually and see if everything works as expected first.

As you can see in this screenshot, the ready count drops below the desired count and is up again within the expected timeframe. If the pod is not ready within sixty seconds, the experiment is considered a failure.
Step 2: Create an API Access Token
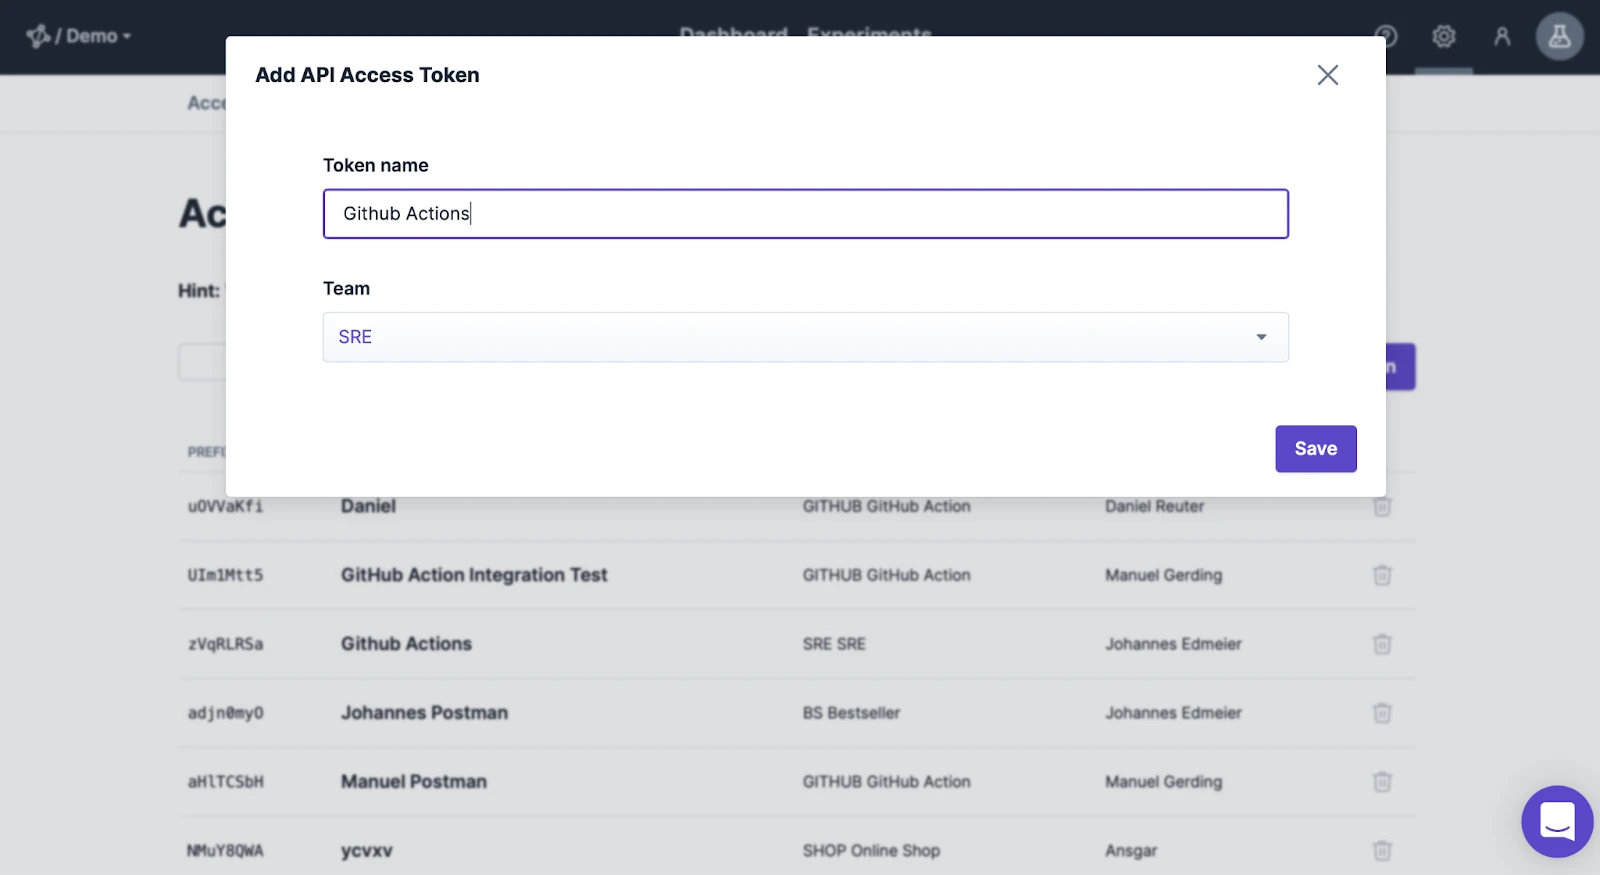
In order to start the experiment from the deployment pipeline, we first need to create an access token under Settings > Access Control > API Access Tokens.
Give the token a name and select the team it should belong to. The token can only be used to run experiments of that specific team.

Please make sure you copy the value for the access token. You won’t be able to retrieve it later.
Step 3: Automate!
In this last step, we add a trigger for the experiment to our deployment pipeline. In this way, we test not only code changes but also Kubernetes configuration changes.
As we deploy our application using Github Actions, we can execute the experiment with a step using our Github Action:
Don’t forget to add the API access token to the repository secrets in Github!
Now, every time the Github Actions workflow is executed, the application deployment time is measured and compared to the 60s threshold.
Conclusion
So as you can see, automating chaos experiments is not that hard. Starting an experiment is very simple. The key to success is to include verification in the experiment, as we did with the pod count check.
One thing we haven't discussed yet is,whether to test with every build, each day or just before going to production. But no matter how often you test – you may want to define a basic set of experiments as a quality gate the application has to pass before it is deployed to production, so you won’t be surprised badly.

