
Blog

-
10 minutes
read
A step-by-step guide to show how to use the AWS extension to inject failures into AWS Lambda Functions
In the previous blog articles (Part 1, Part 2, Part 3), we’ve created an extension for Steadybit to use Gunnar Grosch (@GunnarGrosch) ‘s failure-lambda library to do Chaos Engineering with AWS Lambda. In between, we merged the code into the Steadybit AWS extension - so there is no need to write code. So this is a step-by-step guide to show you how to do Chaos Engineering for AWS Lambdas with Steadybit.
Prerequisites
To follow this guide, we need the following:
A Steadybit Account. If you don’t have one, you can sign up for a free trial account;
An AWS Account, a free-tier account will do.
Node (with npm), Bash shell, git, ssh client, and AWS CLI installed and configured locally
The Necessary Steps
Create and deploy AWS-Lambda function wrapped using failure-lambda
Deploy the Steadybit agent and AWS extension
Design and Execute the experiment
Create and deploy the AWS Lambda function
We will use the nodejs-apig sample from the AWS Lambda developer guide. We clone the repository onto our disk and cd it into the sample-apps/nodejs-apig directory.
We need to integrate the failure-lambda library into our function. The library will do the actual failure injection. We decorate our handler function with the library. With every request, the library checks the System Manager (SSM) Parameter for a failure injection configuration and alters the behavior accordingly, or just calls the handler if nothing is configured.
First, we're going to add the library:
Then we edit the function/index.js and wrap the handler:
As the function now consists of multiple files, we must include the node_modules directory in the bundle that will get uploaded. We take a small shortcut for this (instead of e.g., integrating a bundler) and add a symbolic link for node_modules in the function folder so that the cloud formation template will pick it up:
We edit the cloud formation template.yml: We need to add the AmazonSSMReadOnlyAccess Policy so the lambda can read the SSM Parameter with the failure injection configuration. Caveat: the policy allows reading any parameter. In a productive deployment, use a more restrictive policy.
In the same file, we also set an environment variable to tell the lambda-failure library which SSM Parameter to use:
Now we're ready to deploy the Lambda function with the scripts provided by the sample and test it.
You can invoke the lambda using the ./3-invoke.sh. If everything works correctly, the output should look like this:
Deploy the Steadybit Agent and AWS Extension
So now we need to deploy the Steadybit agent. The simplest way to add an agent and the aws extension is to spin up a t2.micro EC2 instance and install the agent and extension there.
We login into the AWS Console in the browser, navigate to EC2, and hit the launch instances button. A t2.micro instance running Amazon Linux is excellent; we add an ssh key pair to have access via SSH; before finishing, we also add an IAM instance profile in the “Advanced Details” section. The IAM instance profile needs the following policy attached:
This IAM policy allows the Steadybit AWS extension to discover the AWS Lambda functions and to set the SSM Parameter with the failure injection configuration.
With the instance profile set, we can launch the instance and ssh into it. We switch to the root user and use the command for the Linux installation method from the Steadybit onboarding (or in Settings / Agents / Add Agent).
Right afterward, we install the extension using the RPM from the github release page:
We now have to set the region for the extension in /etc/steadybit/extension-aws
And register the extension at the agent by adding the following lines to /opt/steadybit/agent/etc/systemd.env
After changing the configuration, we need to restart the services:
When everything is working, the agent is listed in Settings / Agents.

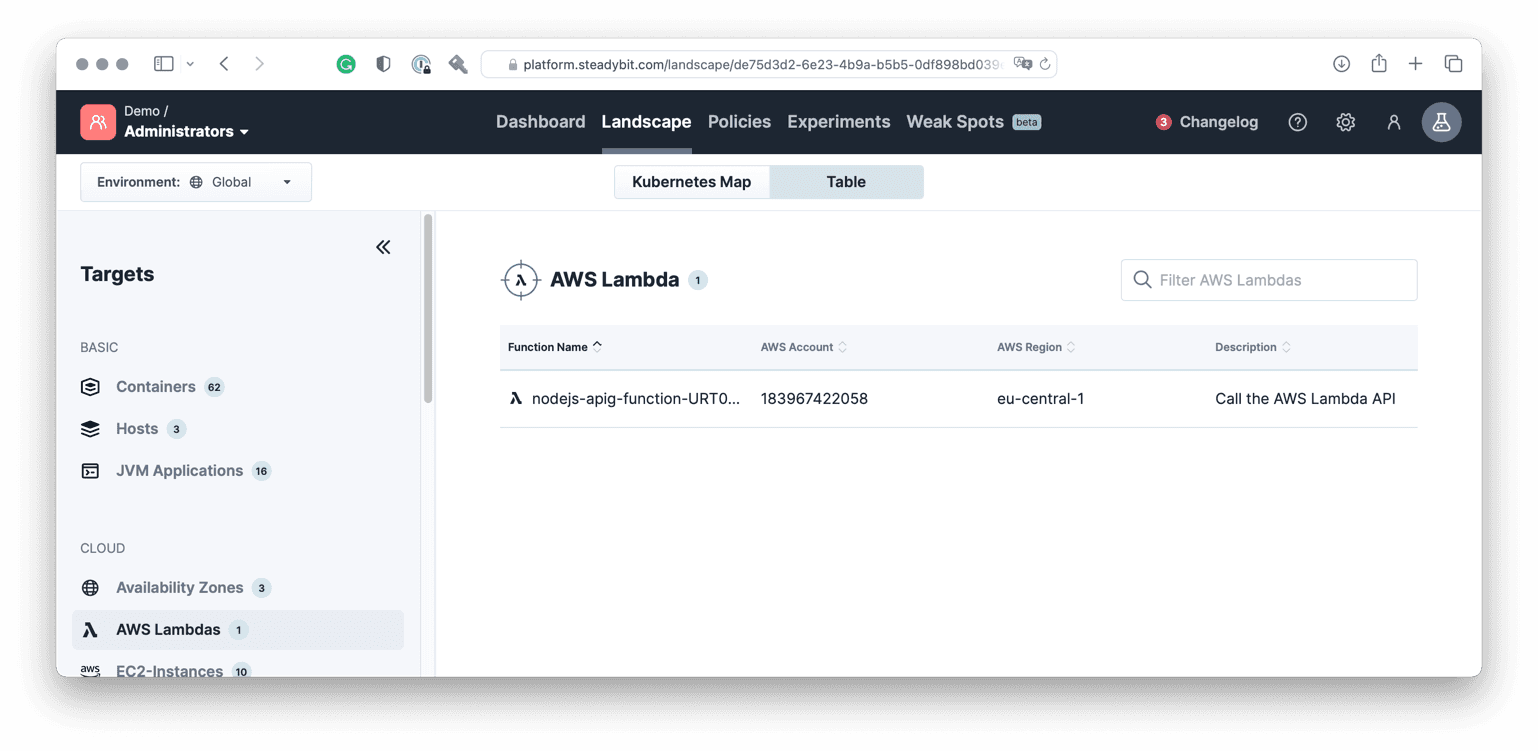
And the Lambda is listed in Landscape / Table.
Design and Execute the Experiment
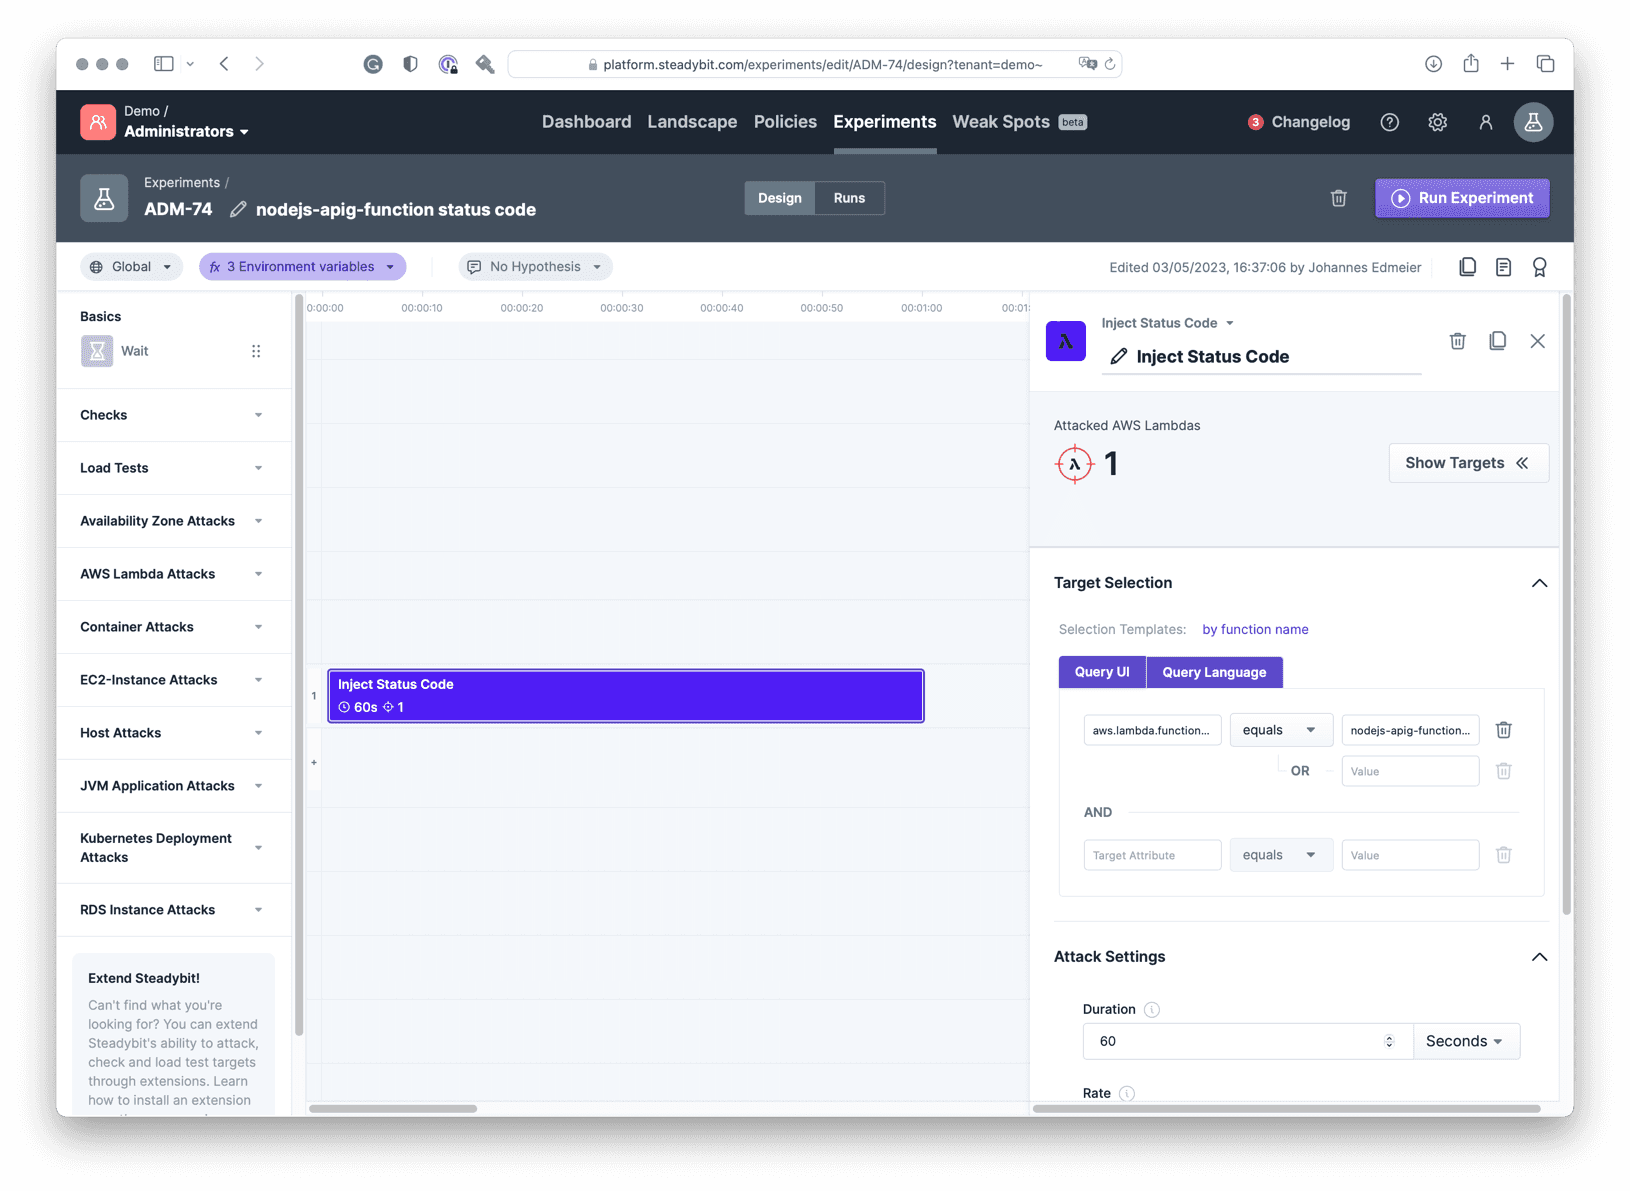
We create a blank experiment and use one of the AWS Lambda steps.
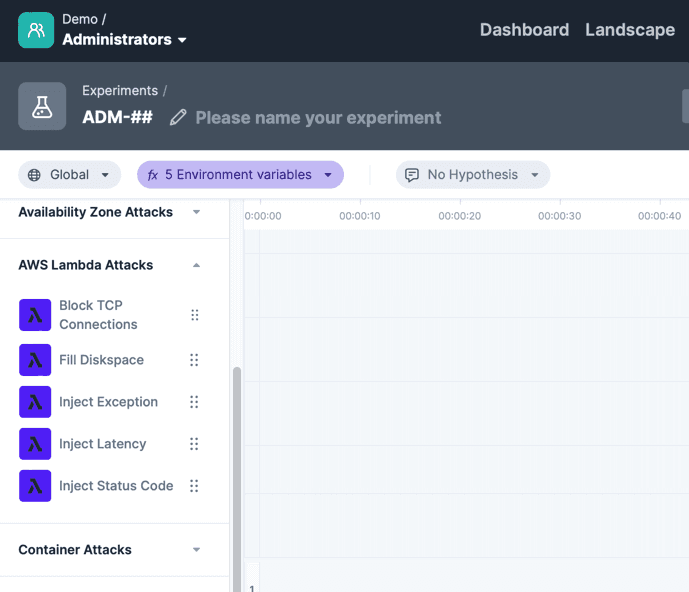
We're using the “Inject Status Code” and targeting our nodejs-apig-function. This will instruct the failure-lambda library to return a fixed status code instead of invoking the handler.
When we run the experiment and invoke the lambda (while the experiment is executing) using the ./3-invoke.sh from the sample, we should get this output:
Thats it! The status code injection is working. The Steadybit extension successfully wrote the failure injection configuration, which the failure-lambda library picked up, and therefore, the lambda function returned a status code 500.
Summary
With a few steps, you can set up a chaos engineering tool for AWS Lambda functions and get an appealing, approachable UI to do the actual chaos engineering.
The sample application and attack are simple and may not reflect what you are dealing with. But Imagine what you can now test:
How do other applications (depending on your lambda) behave when the lambda response times get slower or have intermitted failures (using the inject status code/exception/delay attack)?
How does the lambda itself behave if some external service is not reachable (using the block TCP connections attack)
Test what happens when the lambda is running out of temporary disk space (using fill disk space) - may be due to extraordinary load or humongous requests