
Blog

-
5 min
read
In this blog post, we'll take a look at what Liveness Probes are for in the first place and how we can use steadybit to verify that they are working correctly.
Prerequisites
For the hands-on part of this post, you need the following:
A Kubernetes cluster. If you need a cluster, you can set up a local one by following these steps.
An application that runs on Kubernetes. We use our Shopping Demo showcase application.
A tool to inject HTTP errors into the service. We use Steadybit for that in our example, but you can also use any other tool that is capable of doing that. Maybe the Chaos Monkey for Spring Boot is a helpful tool in that space, which, by the way, was created by our CEO Benjamin Wilms.
Basics
Liveness and readiness probes are essential for the successful operation of highly available and distributed applications. Over time, services can get into a state where the only solution is to restart the affected service. Liveness probes are there for exactly this case. They perform a specified liveness check. This can be for example the call of a health endpoint or the execution of a check command. If this check is not successful, Kubernetes restarts the affected pod.
Defining a Liveness Probe
But first, let's look at how to define a liveness probe in the first place. The Kubernetes Documentation provides many more details.
See here for the complete example.
The example is a Spring Boot application that is deployed to Kubernetes using this manifest. To make Kubernetes continuously check the liveness of the application, we use the Health Actuator Endpoint provided by Spring Boot. If the endpoint stops responding or returns an error, the affected pod is restarted in the hope that everything will work again afterwards. You can quickly run into a restart loop due to buggy code or unforeseen circumstances, which may affect the availability of the entire application. However, you should verify that this works as intended with help of chaotic tests, especially for the critical areas, where the effects cannot be easily verified by static tests.
Validate Liveness Probe with an experiment
Ok, let's start the experiment and define the hypothesis first:
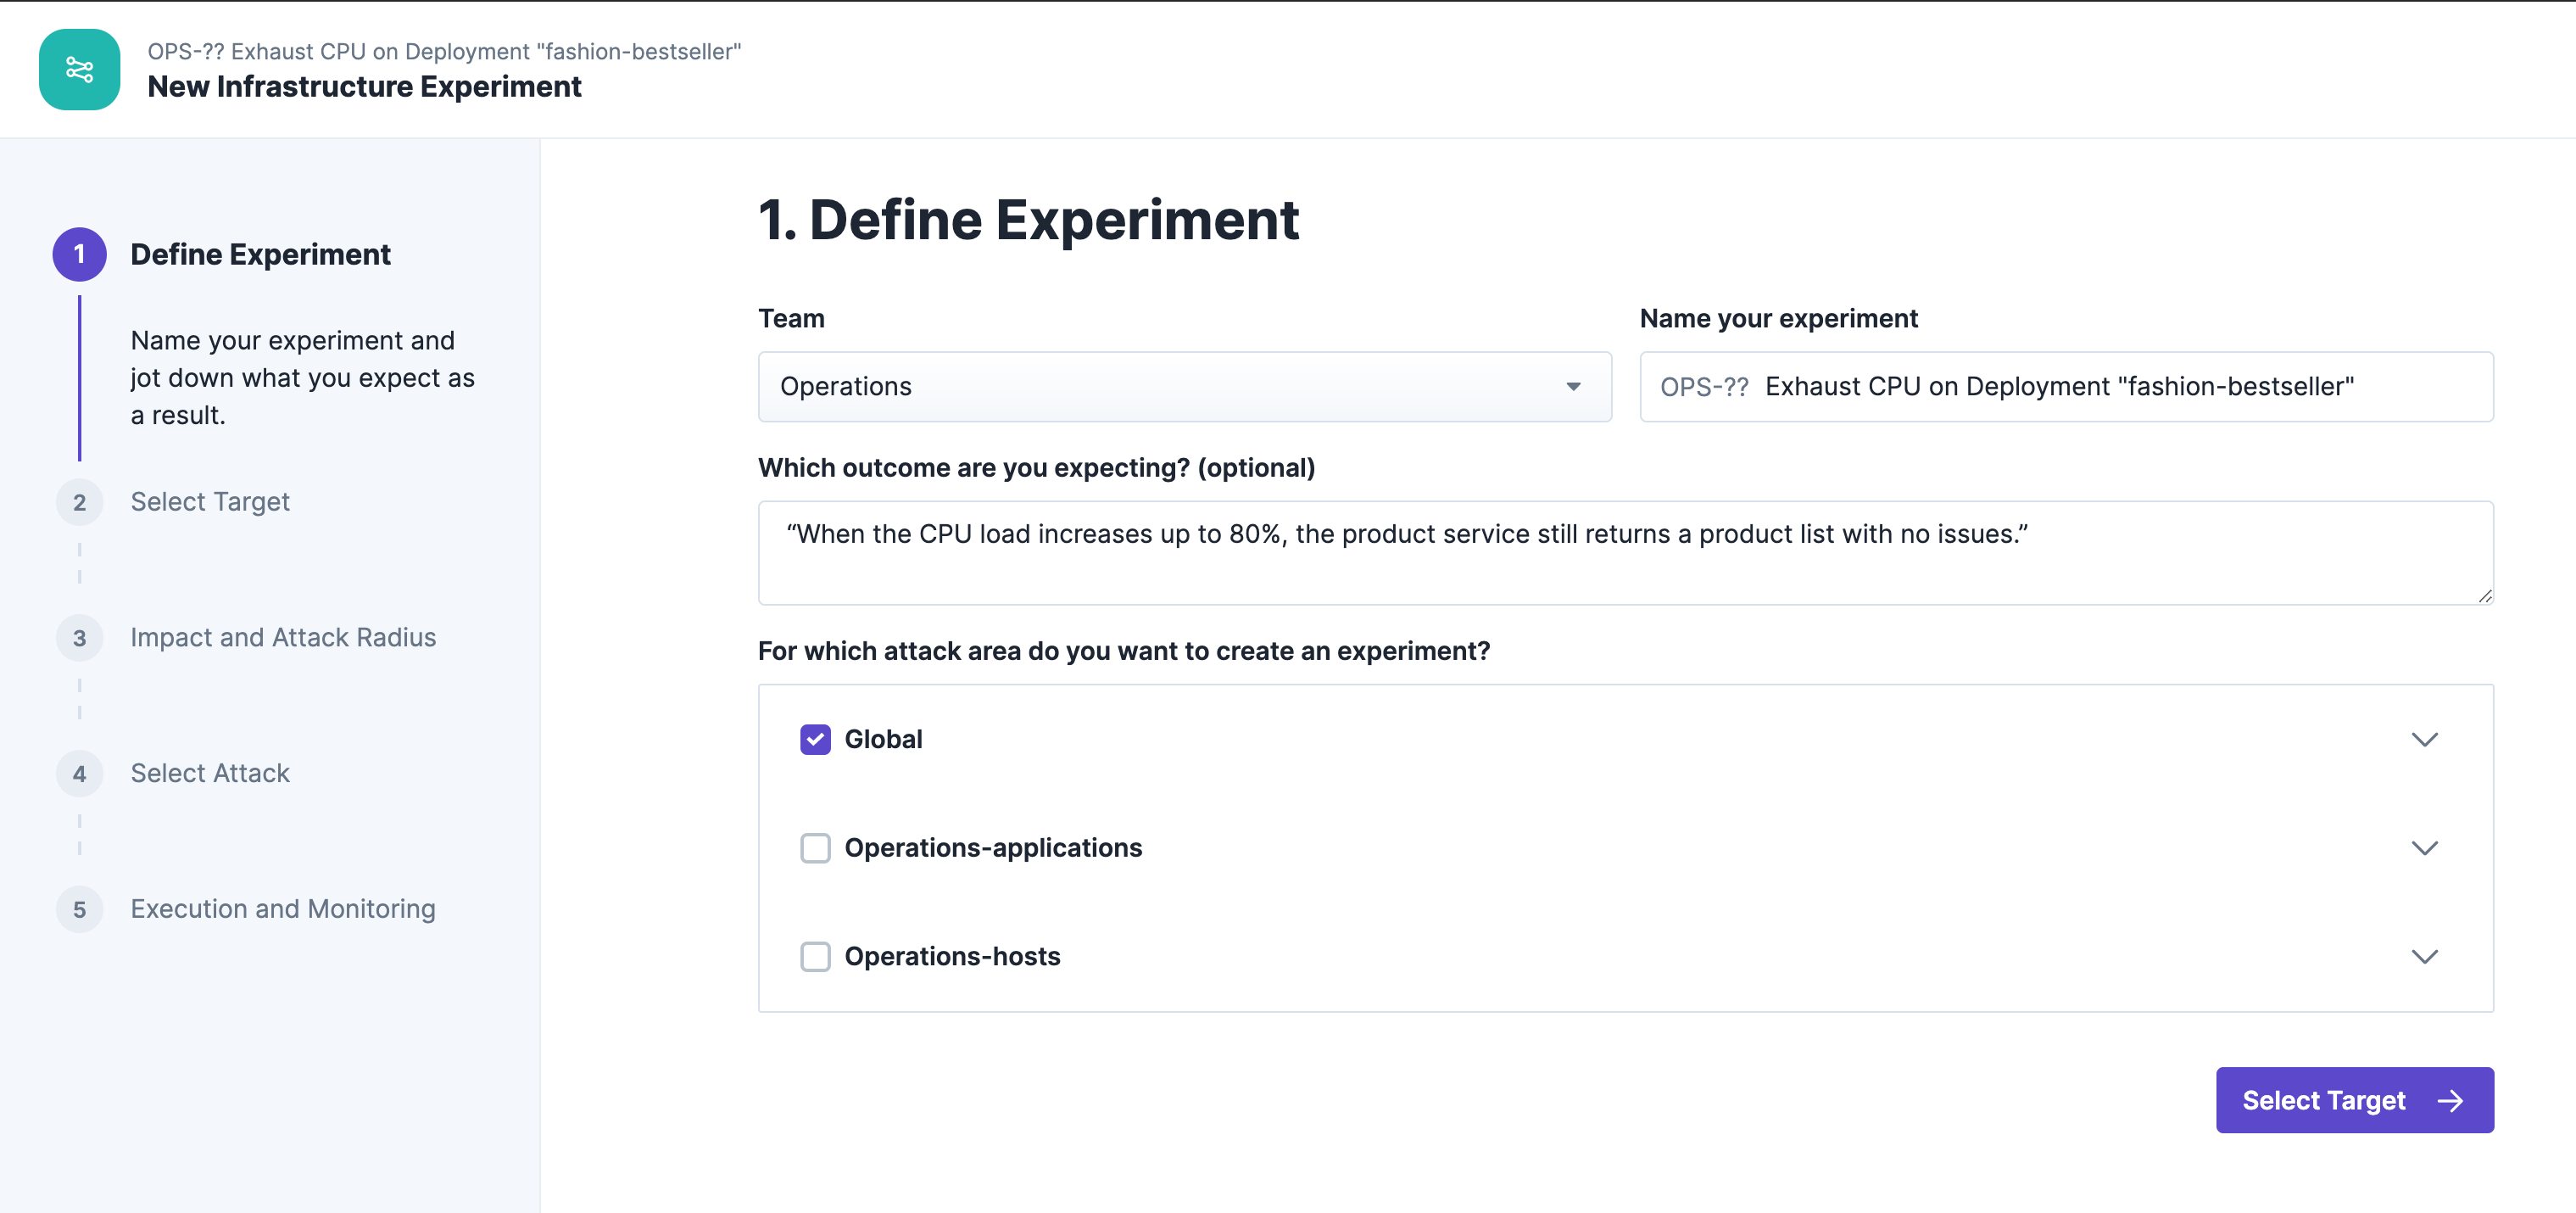
The target of our experiment this time is at the application level. Accordingly, we select it here:

This time we attack all instances of the application. Since the application runs on Kubernetes, this corresponds exactly to the number of pods:

For attack, we choose the "Controller Delay", which allows us to inject dedicated latency at the endpoint level. We set the response time value to 2 seconds so that we can later check if Kubernetes detects the faulty service and restarts it. As seen above, the sample timeout (timeoutSeconds) is set to 1 second, which means that all requests exceeding 1 second will result in a restart of the pod.

After starting the experiment we need to wait a few moments:
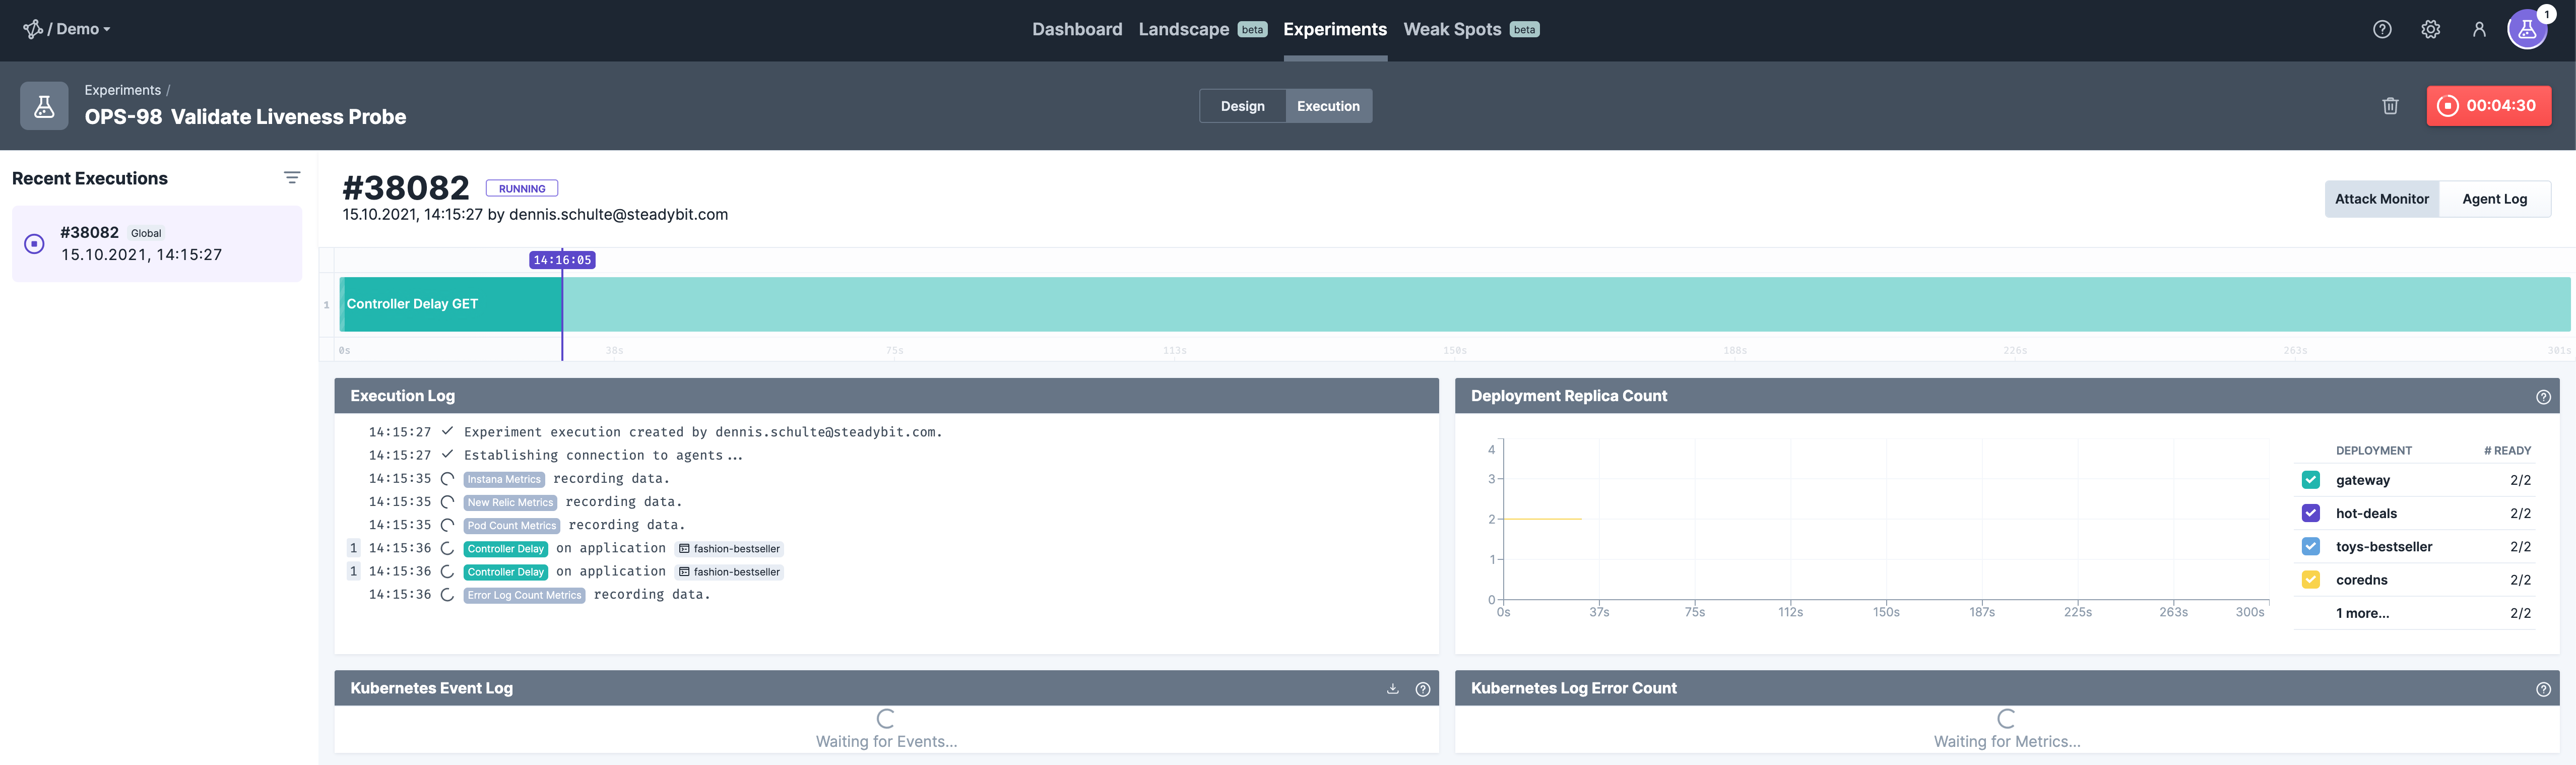
Great, in the Steadybit Live View, we see that Kubernetes restarted the two affected pods after the liveness probe failed:

With the help of this experiment we have very easily proven that the liveness probes are correctly configured and functional. Of course, it would be interesting to do further experiments in the next step to check if everything is still good in this case. Besides the controller delay shown here, there are many other attacks that could be tried. An obvious one would be the injection of errors. What do you think? How does the service behave in this case?